Homemade Eggnog

December is my a great month for me as it’s the one month I allow myself to indulge. It’s once a year certain delicious treats come around and Eggnog is definitely one of those! I use to make my own eggnog, then got too lazy and now I started to make it myself again! It’s wonderful, simple and delicious!

Ingredients: makes about 4 cups
5 large eggs (4 extra large eggs)
1/2 cup cream
2 cup milk
1/3 cup sugar
3 tbsp rum (optional)
1 tbsp cinnamon
1 tsp nutmeg

To begin, I start by separating my eggs.

Then, we whisk the egg whites until soft peaks form. Once that happens, throw about 1tbsp of sugar into the egg whites and mix again. We can put it aside until the end.

Then, we beat the egg yolks until they are fluffy and lighter in colour. Once that has happened, we can gradually pour the 1/3cup of sugar into the egg yolks and mix again.

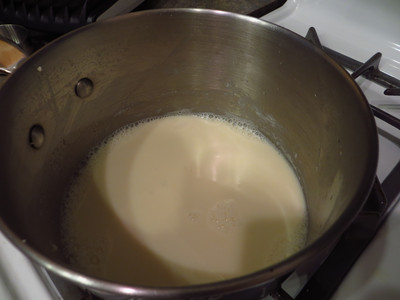
When the egg yolks are mixed thoroughly, pour the 2 cups of milk, 1/2 cup of cream and rum into the egg yolks and mix until it’s blended.

Now we’re ready to season the eggnog mixture with the rum, nutmeg and cinnamon.

Your eggnog is pretty much done now. All we need to do is whisk in the egg whites and enjoy! You can have some as is – or you can chill it and then serve. I usually claim it lasts only 3 days.

Enjoy and Merry Christmas!

Homemade Soy Milk – 豆漿

Home Made Soya Bean Milk

I have just figured out I really like to make homemade Soy Milk, as it only costs about $0.75 to make a litre of this drink! It’s actually not very hard to make either!

Ingredients: Serving Size 2 Cups (500mL)
1/2 Cup Soy Bean
1 1/2 cup Cold Water

First, you will soak the soy beans for at least 8 hours. I’ve been soaking them over night for the 2 times I’ve made them so far! The beans will actually double/triple in size! As soon as this happens, you can basically peel the shells and you’re ready to make your drink!

Once you’re ready, wash the soy beans and place them in a pot with 1 1/2 cup of water if you’re using an immersion blender, or you can place it all into a blender. I’ve been using my immersion blender as it’s easiest for me! Blend until as smooth as possible, and then pour it through a strainer with a cheesecloth on top to make the milk a smooth as possible. Squeeze out as much liquid out of the cheesecloth as possible.

Once you’ve strained out the beans from the milk, you can boil the milk that you have. I have been adding extra water to the pulp and trying to extract more from the beans and strain again. From here, bring the milk to a boil and set up a strainer with cheesecloth on top of the strainer to collect any missed pieces of soy beans.

Then, I bring the milk back to a boil, and make sure you watch it as it will boil over fast. I strain it through the cheesecloth one last time, but I think this last step is completely optional. Then, just let it cool and refrigerate. I believe this can only last about 3 days in the fridge as there are no preservatives! But, you can enjoy as is, you can add some sugar to sweeten it!

For me, I turned a double batch of the unsweetened soy milk (1 litre) into Dou Fu Fa! Here’s a great recipe!

Homemade Vietnamese Coffee

I love eating Vietnamese cuisine, and one of my favourite drinks that is special and unique would be Vietnamese Coffee, which I found out it wasn’t hard to make at all!

Ingredients
1 to 2 tbsp condensed milk
1 or 1.5 tsp ground coffee (courser grind works best)
boiling water

First, I put the condensed milk in the bottom of my cup. I love my coffee’s sweet when I drink coffee.

Then, I place the coffee grinds into the little contraction which is the French Filter (cà phê phin) – which is the coffee filter. It’s nice to use dark roast to get the strong flavour and the course so it doesn’t fall through the filter. Put the top on the filter and screw it tight. The tighter you screw the top on, the darker and stronger the coffee will be. This will take a longer time for your coffee to brew. Alternatively, you don’t have to tighten it to the max where the coffee won’t be as dark, and you’ll get your drink faster too! It’s up to you! The coffee they typically use is the brand Trung Nguyen

When the coffee has finished dripping through the filter, you’re ready to stir it up to dissolve the condensed milk and enjoy. If you like an iced version (ca phe da), fill a glass full of ice and enjoy!

Homemade Hong Kong Style Nai Cha – 港式奶茶

Hong Kong Style Milk Tea Recipe

I recently been craving a lot of childhood goodies, and one of the things I really like is Nai Cha which literally translates to “milk tea“. It’s also known as “Pantyhose Milk Tea – 絲襪奶茶” as historically, they used pantyhose as a filter to make this tea smooth. I really enjoy the Hong Kong style Nai Cha which is quite dark and strong, so I’ve been playing around with ways to make my own version at home.

Ingredients:
4 cups of boiling water
6 Black Tea Bags
2-3 Tablespoons of Condensed Milk

First, in a pot, I add about 4 cups of water and bring it to a boil with the tea bags (with the bags in the water and the string sitting on the handle). I like to use Lipton Yellow Label Tea, but you can use whatever black tea you like.

Once the water boils with the tea bags, the water starts getting quite dark, and since I really like my Nai Cha strong, I reduce the heat a leave it at a simmer for awhile. I’ve been boiling it slowly for an hour.

Then, I let it cool a bit, put some condensed milk in the bottom of my cup and pour the tea on top.

Once I do that, the best part is next – stir and enjoy! These drinks are normally served with light meals or breakfast! But, I like this Nai Cha wherever and whenever!

Another alternative to this is the more traditional cafe style where you can replace the Condensed Milk with Evaporated Milk and sugar. Be sure to add the sugar before the evaporated milk if you choose to go that route! Both milks are wonderful in milk tea! If you’re craving iced milk tea, make the nai cha with either sugar and evaporated milk or condensed milk and allow it to cool for a bit. Then, in a tall glass, fill it with ice and pour the nai cha over the ice – stir and enjoy!