Blue Dragon – Thai Red Curry Paste

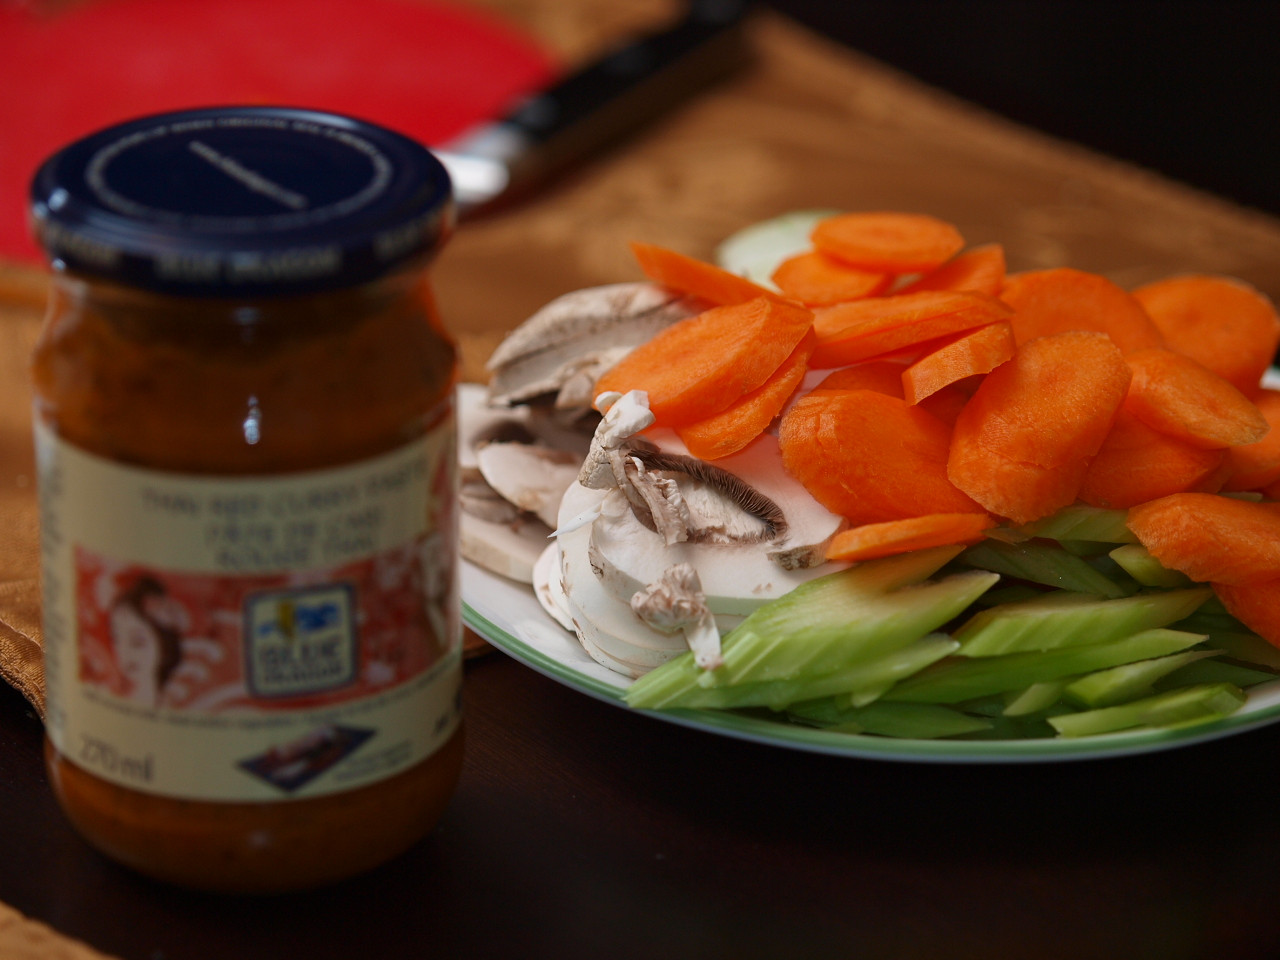
I really love products out there that helps me make meals that are quick and delicious! I got to try this new paste from Blue Dragon called Thai Red Curry Paste that comes in a convenient jar.

Here’s my little recipe for my meal:
Ingredients: (serves 2 large portions)
– 2 carrots sliced
– 2 stalks of celery
– 1 small onion
– 4 to 5 white mushrooms
– 4 pieces of chicken thighs
– 1/2 jar of Blue Dragon Thai Red Curry Paste
– small can of Coconut Milk (165mL)
– Cooked Rice

I wasn’t too sure what to do with this sauce and on the back of it, it kind of states that it’s extremely versatile, so I decided to basically make stir fry with the sauce (stir fry with chicken and vegetables over rice), and it was really simple! I first prep my vegetables by cutting everything into even pieces. I just used whatever I had in the fridge, which was onions, celery, carrots and mushrooms. Of course, wash and cook your rice to start with. The entire meal takes about 30 minutes to make start to finish.

Put the vegetables aside, and slice the chicken thigh. I did do a quick marinade of salt and pepper as I love to add a little something on my meat – always! After it marinates for a few minutes, I heat up a wok and some oil. Then, I add the chicken to the wok and leave it for a few minutes. Once the chicken is about half cooked, I add in the onion and carrot into the wok. Once the chicken is almost cooked through, I add the rest of the vegetables and cook it until it’s a nice tender crisp.

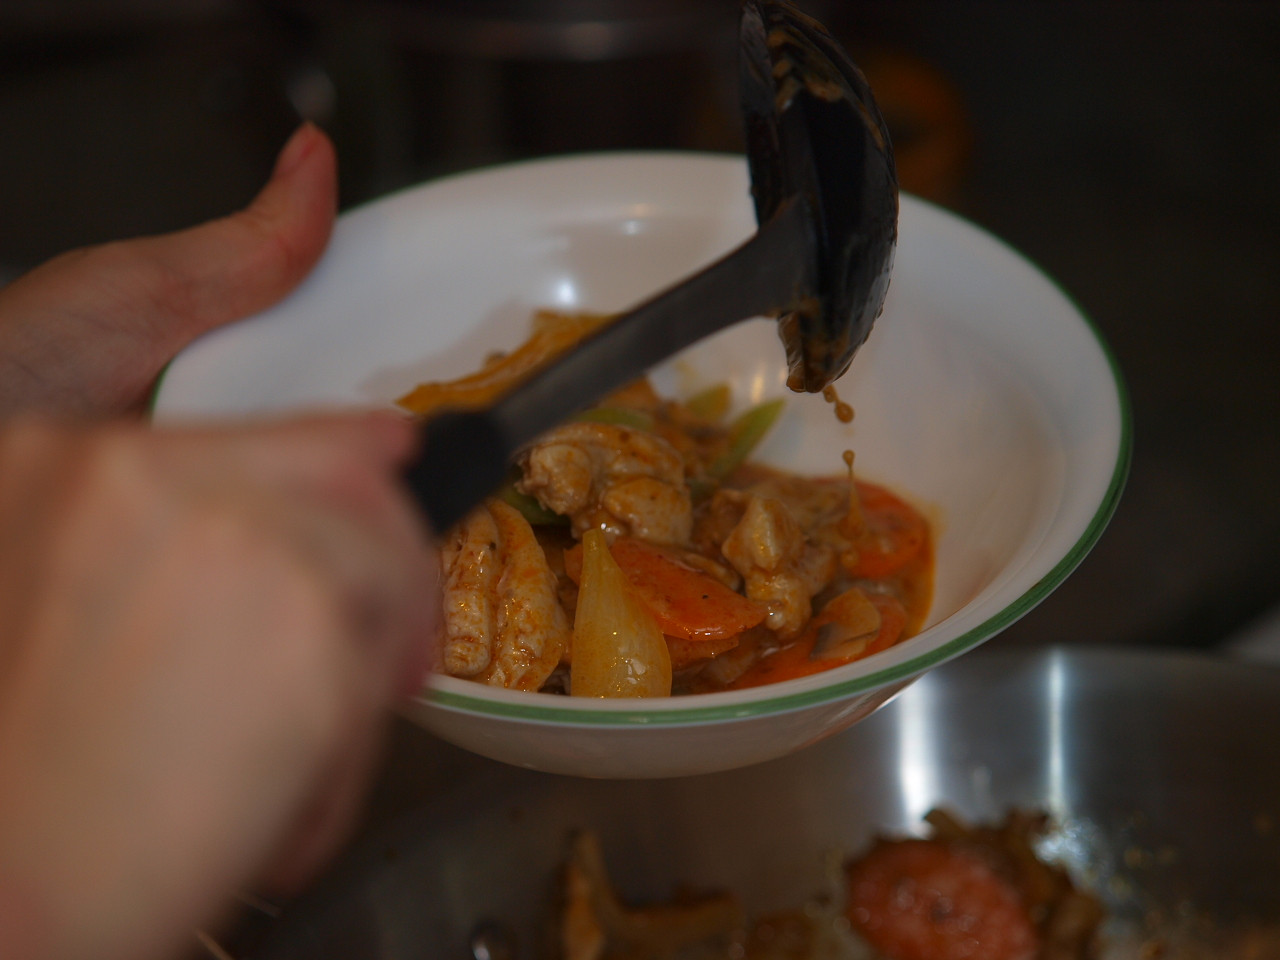
Basically, we’re on the home stretch now – it really is this simple! From here, I add 1/2 a jar of the red curry sauce due to my portion sizes, and a small can of coconut milk. I turn the heat down as I like to cook my coconut milk gently. I stir and let my stir fry simmer away for a few minutes so it can absorb the great flavours.

From here, I added a few more chili flakes as I like my curries a tad spicer. But, we are ready to serve and eat already! Just get a bowl of rice and top it off with the delicious curry!

The finished product is filled with Thai flavours such as ginger, lemon grass, and chilies. It’s absolutely amazing and it tastes great even if you opt out the coconut milk.

Jing Jing Bakery

I love bakeries and I like them from any nationality or location. This one particular afternoon, I really wanted to pick up a bun and take to me on my zoo adventure that I was going on later that day. I went downstairs and it was around 1:30PM and there wasn’t anyone else in the bakery, but it still smells like fresh products was still coming out of the oven. Sure, the place does look creepy, but I think the product I got from here was well worth the creepiness!

20130224_105126

We ordered just 2 items as it was meant to be a tiny snack for the zoo break. I ordered an egg tart (which I failed to take a picture of) and a pineapple bun! Sure, the bun doesn’t look good, as my homemade pineapple bun looked better… but both of these items was still warm when I purchased them… so, we actually ate it right away instead of saving it for the zoo. Just as I was eating away at the pineapple bun, the cookie topping was do light, crispy and perfect. I was just about to start thinking the pineapple bun was a little plain as well, but I continued eating it… and inside was a sweet delight… it actually had pineapples in it! This totally made my day, and I’m proud to sa this is one of my favourite pineapple buns now!

Jing Jing Bakery - Pineapple Bun

Overall, I have no problem returning to try more items. It’s a small bakery, but the products are just as good as good as big bakeries! Who needs a pineapple bun with just butter now?! I’m not sure how I will ever go back to a regular pineapple bun!

Jing Jing Bakery on Urbanspoon

Jing Jing Bakery

100 – 3rd Ave SE
Calgary, AB
(403) 265-9588

Caffe Rosso – Calgary, Alberta

We love taking pictures from Scotsman Hill which isn’t really too far from here at all! It’s actually within walking distance as long as the weather isn’t awful! After a morning of taking some pictures of the skyline of Calgary, we decided we would drive to Caffe Rosso to warm up and to experience this remote coffee shop!

From Caffe Rosso, I ordered my favourite, just a Chai Tea Latte and it was perfectly sweetened, perfectly spiced. It was hot and perfect for a cold day!

We also ordered a Latte and to my excitement (as always), there was latte art! I just love places that take the time and do the foam art! It really adds and enhances my coffee experience. The coffee here is strong, dark and rich but it was still a great latte!

Now that we’re aware of this cool place, I’m sure we’ll stop in when we’re in the area taking pictures again! I like it here even though at first glimpse, I was kind of creeped out by the location.

Caffe Rosso

803 24 Ave SE
Calgary, AB
(403) 971-1800

Diner Deluxe – Calgary, Alberta

I really love watching Food Networks You Gotta Eat Here and when I heard that John Catucci got to eat at Diner Deluxe I knew it was a place I would like to visit sometime. I finally made it there right before Christmas, and it was packed! We waited quite a long time for a table, and the service was really quick!

Once were seated, the waitress came to give us the drink specials, and already they had alcoholic specials, which I knew I couldn’t do for a morning drink… so, I just ordered a delicious Hot Chocolate and it tasted as good as it looks!

For the breakfast, I ordered my favourite, Eggs Benedict!! I ordered what they called Canadian Bacon Benny which came with 2 poached eggs on buttermilk biscuits, with basil hollandaise sauce and hash browns. On the actual benny itself, it had large slices of Canadian Bacon, essentially ham! This combination was delicious, and I definitely think about returning to try their Smoked Salmon and Capers Benny! I think that would be a wonderful breakfast at any time!

My other half ordered what he loves to love, the Pulled Pork Hash which was quite feast for him! It consisted of 2 poached eggs, BBQ pulled pork, grainy Brassica Mustard, Caramelized Apples and onions, hash browns and toast.

Overall, it was a perfect way to start the day and I would love to return. The prices wasn’t terrible as the portions are huge. Food tasted great, so I had a wonderful time! Like I said, I would love to return to try other options, and I would love to try what I believe was like a market or bakery right next door. Just as we were leaving, someone was telling us it was good too!

Diner Deluxe

804 Edmonton Trail NE
Calgary, AB
(403) 276-5499

Homemade Seitan (Gluten) Puffs – 齋麵筋

Home Made Seitan Puffs or Braised Gluten

I’ve always loved Seitan and I’ve never learned that term until recently. I was thinking about one of my aunts who makes delicious “sweet and sour gluten” and really wanted to make it myself – so I attempted to figure out how to make the basic seitan first, and then we’ll go from there.

Seitan is a meat alternative, and I guess it’s got proteins in it. Basically, you take flour and knead it until it gets tough – or form the gluten. The more you knead for this recipe, the better. Then, you was away the flour such that you’re left with the gluten (or what they call seitan).

Ingredients:
1 cup bread flour (or gluten flour)
1/2 cup water
1/4 tsp salt

Basic ratio turns out to being 2 parts flour and 1 part water with a pinch of salt. It seems to work really well for this! Combine the 2 ingredients until they form a dough, and knead, and knead. This will be helpful if you have a machine that can do it for you! I used bread flour as I couldn’t find gluten flour anywhere (I wanted a Chinese brand, but basically the more gluten your flour has, the better!). If you use All Purpose Flour, this will work too, but you’ll be washing out more than half of the dough’s size as not as much gluten is formed.

After extensive kneading, the dough should be a tad tough with a lot of give. If you poke your finger at it, it should bounce back – almost looking as though you didn’t poke it at all. At this point, I let it sit as I set up the sink tap to a comfortable warm temperature.

Once the water is at a nice temperature, I just keep washing the dough, and the flour will eventually wash out. You’ll be left with something that looks stringy, but it’s holding on together. It’s quite a delicate process, so treat this with care – you don’t want to be breaking it up into part, or you’ll never get it back together!

When you think the water from the dough has started to run clear, or close to it – you’re probably done washing the flour out. For me, as I’ve used the bread flour, I did loose about half the dough, but it’s no big deal. I just went and made another batch! Notice the texture on the left, as it’s really “brain like”…

From here, I chop up the gluten into little pieces as I’m experimenting, I like mini portions. I set up some oil to fry with, and it’s important it’s at a low heat with hot oil. Since it’s made with a lot of water, it can either blow up or cause a lot of splashing if the oil is too hot. I just leave the seitan sitting there as the oil comes up to temperature.

Now, when the oil seems hot (poke a wooden chopstick in the oil, and it starts bubbling around the chopstick), I’m ready to start frying! Ideally, they will puff up and you just keep moving the pieces of gluten so they don’t stick to each other! I pull them out when they’re golden brown.

Alright, now we got our seitan puffs, I just make a nice braising liquid. This time, I used a curry and I braise it for a few hours until the flavours get in. Once it’s flavourful, you’re ready to enjoy seitan! You can change up the braising flavours, and like I mentioned, my favourite is the sweet and sour sauce, or ketchup one… so I will have to experiement with that!

I actually braised mine in a slow cooker and I must admit, I did over braise it such that it was a little too mushy!! So, keep an eye on it if you’re doing it for the first time (unlike me!)