Second Cup – Maple Latte

Sure, spring is coming back, but Second Cup has brought back a sweet favourite of mine, the Maple Latte! It’s sweeter than a lot of other lattes, since obviously they use maple flavours which is a wonderful latte flavour.

This wonderful latte is made with Second Cups signature spring latte with delicious maple notes, velvety microfoam, and robust espresso taste. It really is as delicious as it sounds and trust me, 100 times better than it looks too!

Be sure to try Second Cup’s Maple Tea as a lighter option!

Homemade Chinese Deep Fried Crispy Milk – 炸鮮奶

Home Made Crispy Milk Recipe

Deep fried foods are always good – it doesn’t matter what you fry, and chances are… it will taste great! I had a craving for Deep Fried Crispy Milk as I was in a deep frying phase at home, so I decided to make some. This is a large batch and can feel lots. For 2-4 people, I would actually recommend cutting the recipe down in half.

Ingredients:
Filling –
4 tbsp Cornstarch
1 small can (168mL) Coconut Milk
1 small can (168mL) Milk
1 tbsp condensed milk
1/4 tsp salt

Batter –
1 cup Flour
4 tbsp Cornstarch
1 tsp baking Powder
1 cup Seltzer water

First of all, the filling does take some time to set, so be sure you make this a few hours prior to frying! To make the filling, mix together the coconut milk, milk condensed milk with a pinch of salt. Then, stir the cornstarch into the cold milk mixture until smooth.

Put the mixture into a pot and heat slowly. The mixture will begin to thicken up – of course from the bottom and sides first, so mix well. Heat until the entire mixture is thick and smooth and could be molded.

Press the mixture into a container, and let it set in the fridge for at least 4 hours.

Once the filling is firm, it is ready to get cut up into small chunks, and I like to cut it up into bit size squares. Then, I make the batter, which is mixing all the dry ingredients together, and then pouring some seltzer water, just enough to get a thick batter. Dunk and coat the filling pieces into this batter, and then fry until golden brown!

Put the golden brown, super crispy fried milk on a plate with some paper towel to absorb some grease. I like to serve it with a little plate of condensed milk. This is definitely best enjoyed hot!

Homemade Deep Fried Bananas

Home Made Fried Bananas

I’ve been starting to eat bananas for awhile now, and I’m in a deep frying phase at my house right now… which is kind of bad. But, I thought a Deep Fried Banana would be an excellent idea! I must note, this batter is enough to coat a few more bananas too… so, you can either make more, or reduce the batter!

Ingredients:
1 ripe banana
1/4 cup seltzer water
1/4 cup flour
1 tbsp cornstarch
1/4 tsp baking soda

First of all, use at least a yellow banana for this recipe! Be careful if it’s too ripe though, as it becomes “mushy” fast. I’ve been trying a deep fry banana everyday – as the banana’s ripen, and with a different batter each time, to think of a better batter. I really like using a version of tempura batter for this recipe!

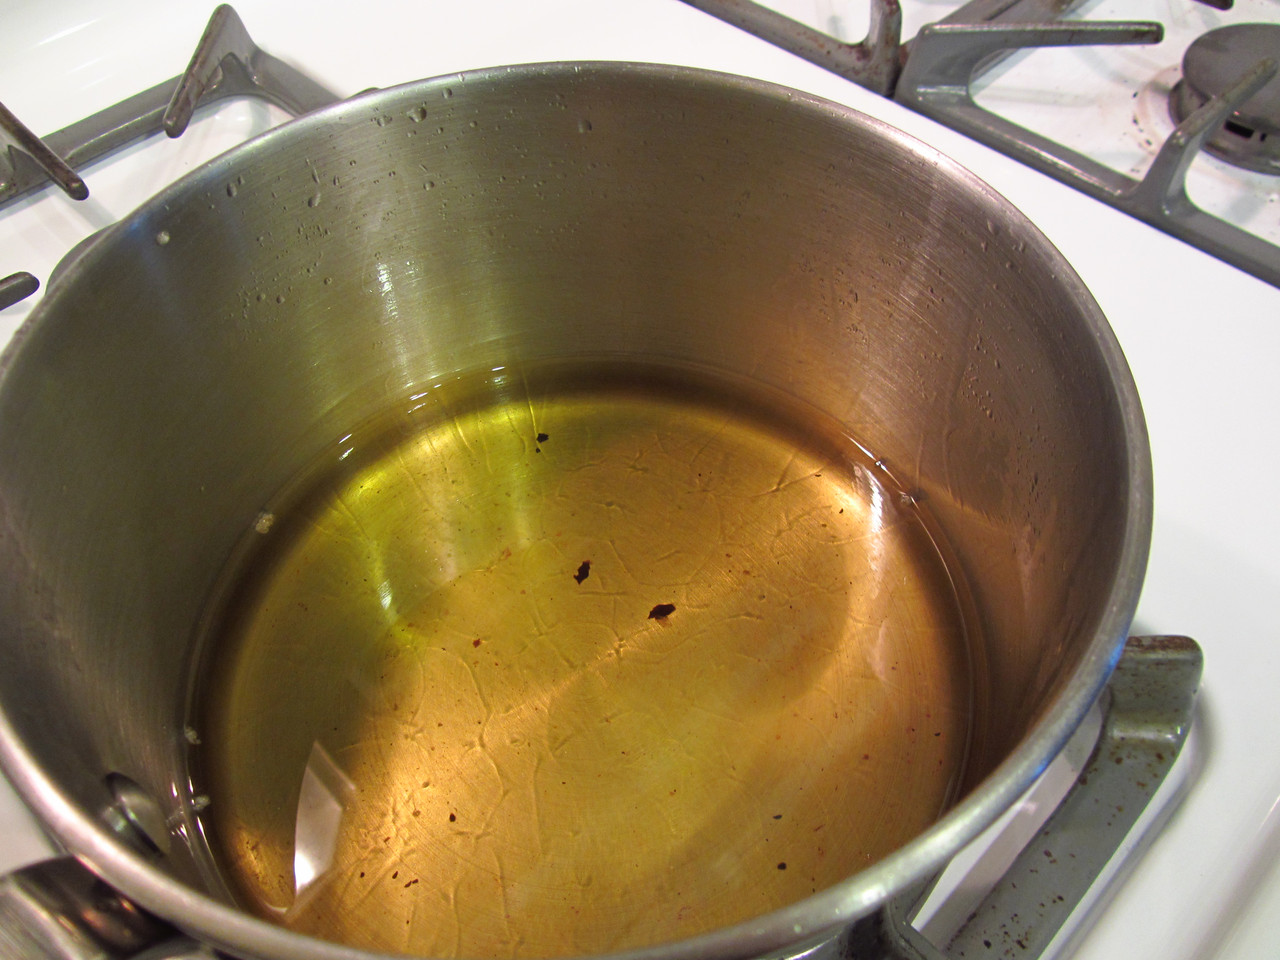
I start heating up the oil for frying as it’s a quick and simple batter.

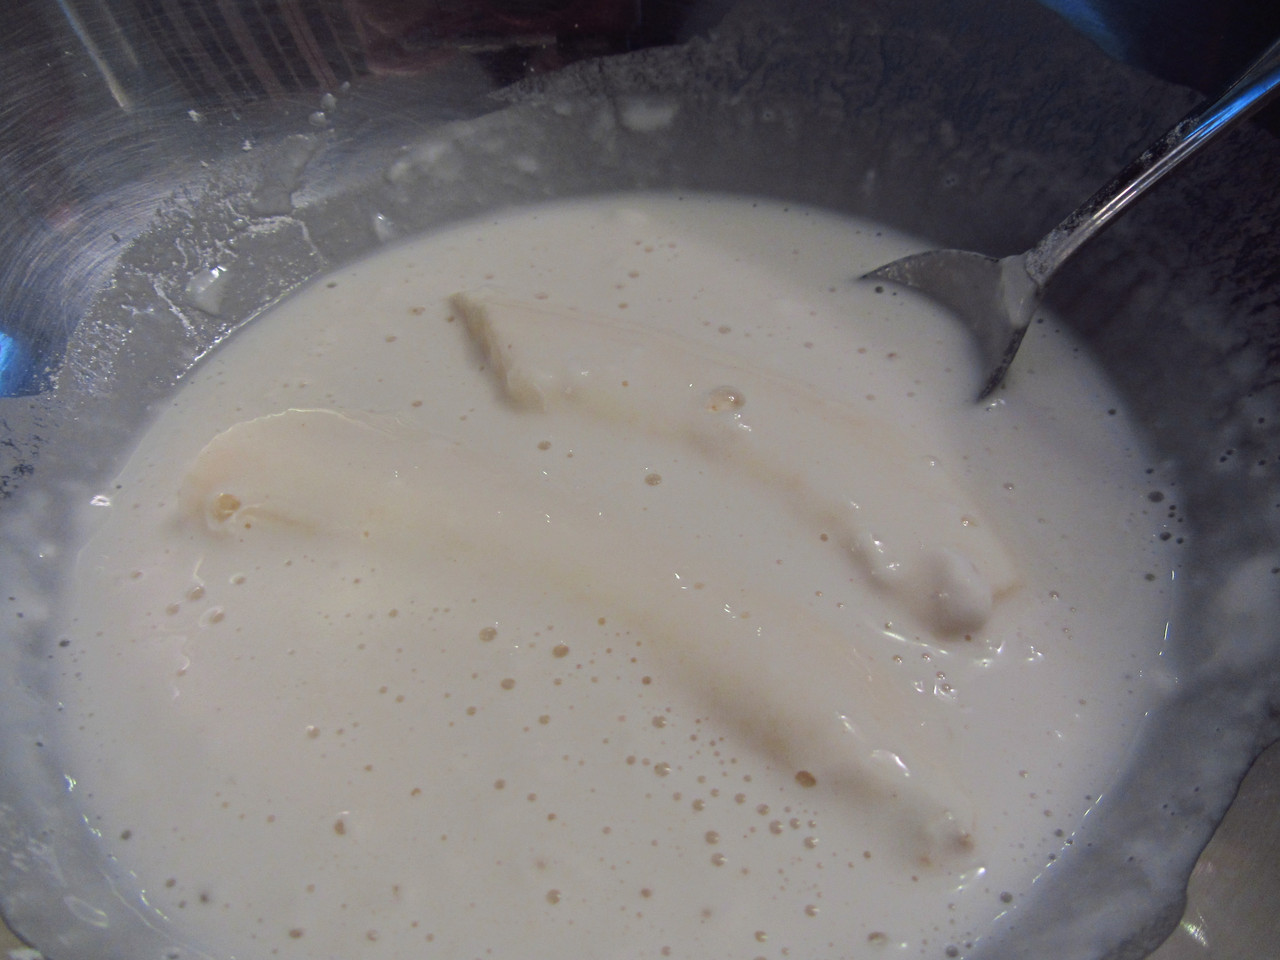
To begin this dessert or snack – if you’re crazy like me… make the batter! Mix the dry ingredients together first, so add the flour, cornstarch and baking soda into a bowl. Once the dry ingredients are mixed, you’re ready to add the seltzer water. Typically, I have been finding myself adding less than the amount called for, and then add some more until I get to a thick consistency that I like.

Then, I split a banana in half, just so it fits in my fryer. I coat the banana in the batter!

Now, once the bananas are coated completely, you’re ready to drop it into the hot oil! Be careful, it can splash – and the oil is extremely hot!

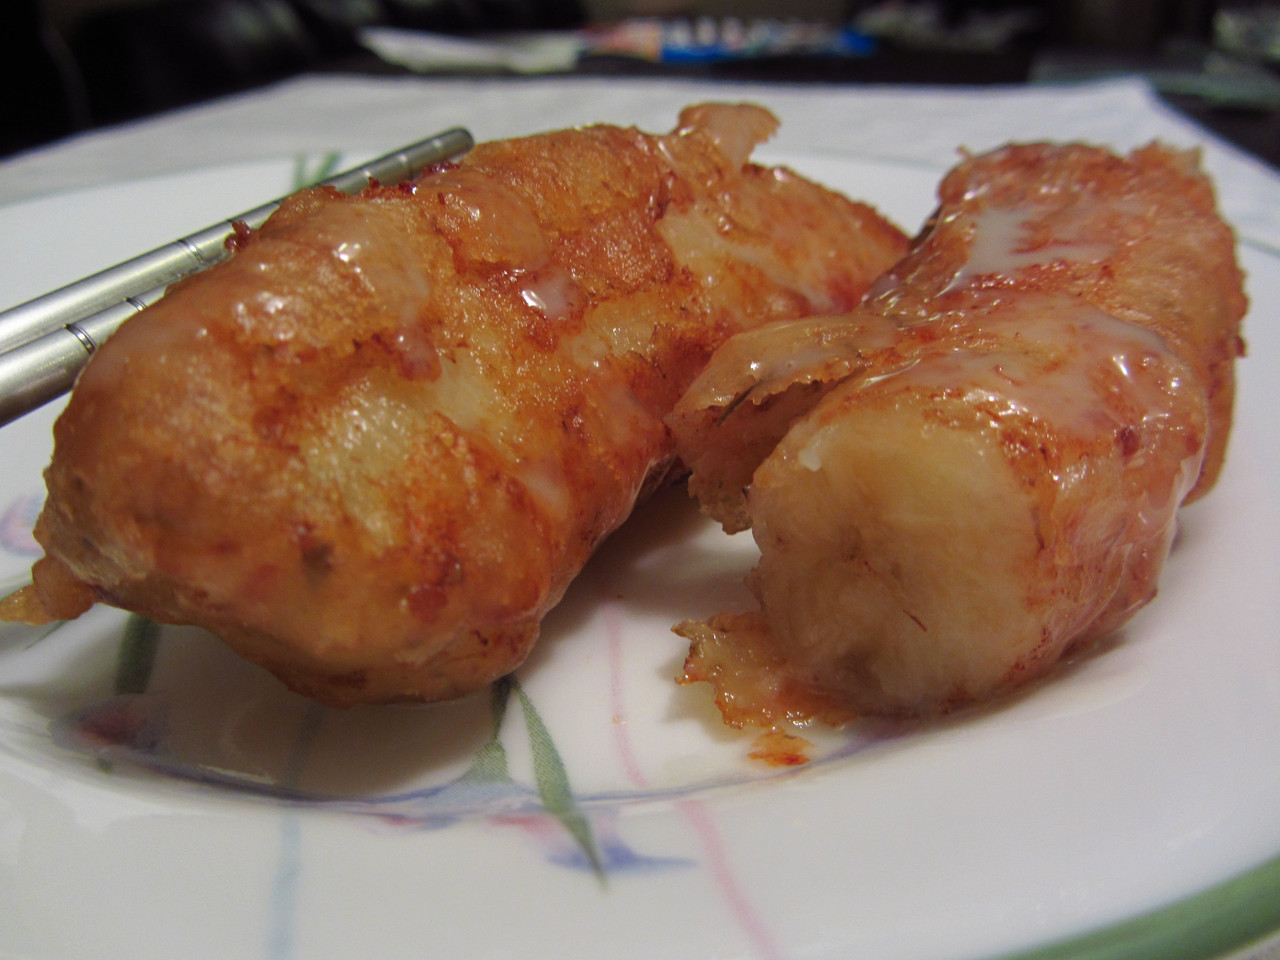
Once the banana coating is crispy and golden brown, you should take it out and put it on a paper tower to absorb some oil.

Now, you can either eat it as is, or drizzle some delicious topping. I’ve tried it with honey and chocolate syrup and it was a really light and delicious combination with the bananas.

Another great topping that I really liked is with condensed milk. While eating this, I was thinking about peanut butter drizzle too… but, I just wanted to enjoy my crispy banana. Basically, the toppings can be endless!

This is best eaten hot and crispy! So, don’t spend too long finding toppings!

Homemade Black Pepper Sauce with Pork Chop

I didn’t know what to make for a meal this one day, and my other half really likes black pepper sauce – on everything! So, I had some pork chop, and decided to make Pork Chop with Black Pepper Sauce

Ingredients:
3 slices of thin pork chop
1 cup chopped mushrooms
1/2 chopped onions
1 tsp pepper
1/4 tsp white pepper
1 tbsp oyster sauce
1/2 tsp dark soy sauce

First, start by marinating the pork with salt and pepper. Then wash the mushrooms, and chop up all the vegetables.

Pan sear the pork chop in a pan until you got good searing colour on the pork. If it’s thick, finish the pork off in the oven. I like to use thin pork chop to avoid this step – so the meat can be resting while we make the sauce!

In the same pan, saute the mushrooms, onions and garlic until tender. Then, add some water to deglaze the pan, and it will become the gravy sauce that you pour ontop of the pork chop and the rice.

While the vegetables are cooking, prepare the sauce by combining the cornstarch with soy sauce, oyster sauce, and pepper. Mix it with some cold water to dissolve before pouring it into the pan.

You can serve this on a plate of rice and some vegetables. You can substitute the meat for any other protein – and it works with just vegetable stir fry as well! Of course, you can add less water to the pan if you like the sauce thicker. There’s never any set recipes in Chinese cooking! Always taste it, and when you think it tastes good – it’s good!

Homemade Rice Crispy with Peanut – 米通

A simple treat that is Chinese and very popular during the Chinese New Years would be Rice Krispies and often has peanuts.

Ingredients:
1/4 cup Roasted Peanuts
1 cup dried rice (I use less dried rice)
1/4 tsp minced ginger (optional)
1/2 lime (juiced)
1 tbsp butter
oil for frying
1/2 cup water
1/4 cup sugar

If you’re wanting to make this recipe, be sure to start drying your cooked rice. I just leave my rice out of a plate, and turn it every once in awhile. It does take a few days to dry completely.

The first thing you want to do is roast the peanuts and then you can set it aside.

Next, get the oil up to temperature on a low boil. I normally turn my oil to medium until you hear the oil bubbling as it’s scorching hot. When it’s at that phase, I turn it down a notch. I then pour the rice in the oil in batches and scoop it out when it’s puffed. The rice is extremely hot and crispy at this stage and the rice will actually stay crispy from here on in.

Now that the peanuts are roasted, and the rice is “puffed”, mix it together in a large bowl – then it’s time to make the caramel! Simply in a pot, pour the sugar into the pot and then the water. Turn the heat on to medium and leave it there. It will begin to bubble, then the water will evaporate. The sugar syrup will begin to brown – and watch for this. From the browning stage it burns fast and there is no turning back after it’s burnt. I like to add the ginger, butter and lime juice right at the end to stop the caramel from cooking further.

When the caramel is ready, it’s important to work fast now as the caramel will cool, set and harden. Mix everything together and press into a dish. Let the mixture cool completely – then cut, serve and enjoy!

<

If you really just want the treat without the labour, it is available in the bakery section of your Asian grocery store! 🙂 Of course, Chinese Rice Crispies aren’t the same when it isn’t homemade!